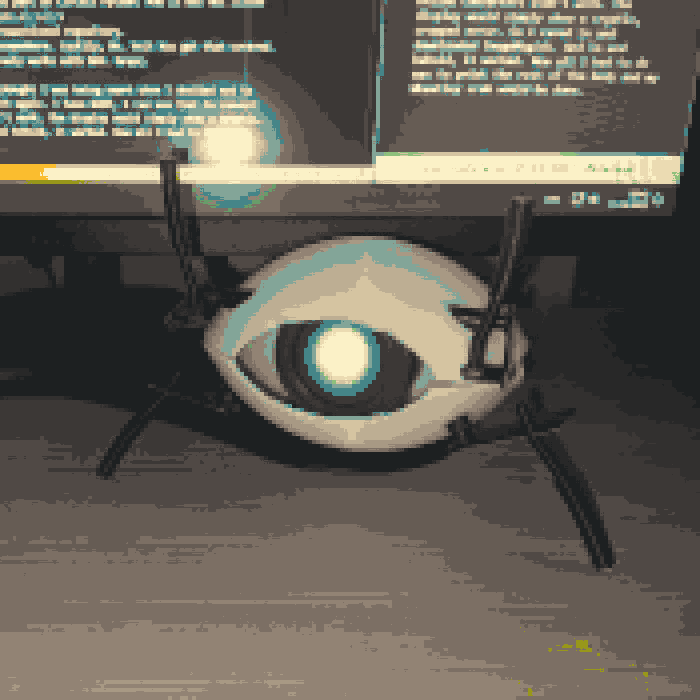
Building wheatley Crab
15.11.23
I've been watching and enjoying Mr. Volt's videos for quite some thime. His creations are very complex and, honestly,
kinda impractical to recreate. However once he made
Wheatley crab video it has been stored somewhere in the back
of my mind. Since I've had some money to spare this fall I thought, what the hell, why shouldn't I make my own
Wheatley Crab. So I ordered the parts and started working on, whatever this was gonna be.
So I ordered some filament, RPI 2040, and display.
And then the problems started.
The display situation
So. Waveshare. Love 'em. There's one thing though. Their 1.28" rounded displays? Yeah there are multiple types.
The non-touch and the touch variants. Of course I got the touch one. It's no big deal I thought, and boy... I was
somewhat right, but also wrong to some degree.
The good thing is that the display worked.
And that's where the good things ended. The first problem was the different labels on cables.
It was annoying, but I managed to make a table of all the differences in pin labels, since the pins in the
video didn't match with the documentation nor my touch display.
| Pico pin | Lables in video | Pins in display documentation | Pins on touch display |
| 3.3 V | VCC | VCC | VCC |
| GND | GND | GND | GND |
| GP10 | SCL | CLK | SCLK |
| GP11 | SDA | DIN | MOSI |
| GP12 | RES | RST | LCD_RST |
| GP13 | DC | DC | LCD_DC |
| GP14 | CS | CS | LCD_CS |
| GP15 | BLK | BL | LCD_BL |
So I connected my TP display to pins on the Pico, but that was not the end of my troubles. The display module itself is a few milimeters larger than non-touch version, which means that it won't fit the display bracket. Unless I print the bracket a few % larger. So the display bracket printed fine, but now it does not line up with the screwholes on the other piece. I mean, I can fit like, 2, maybe 3 screws, but not all 4. And you know what. I don't care. 2 screws is enough and that's what I'm gonna leave it at.
Software
So Mr. Volt leaves a link in the video description to a Circuit Python library that shows images on the display.
However. The repo in question in repurposed. Where the library was once hosted is now simple demo of usage of
said library. Now you may ask where to get it. It is not the standard part of Circuit Python. And it was not listed
in available libraries. I had to look it up somewhere on the internets.
Once I finally got the library needed I loaded the code from the forementioned repository.
But to show the iconic wheatley eye you need to get the image from somewhere. Luckily, Mr. Volt has got that covered.
He provides a link to JPEGs of Portal 2 Core eyes. And the library only works with BMP. Great.
I read that to convert the pictures one should use ImageMagick. I thought I was being smart when I decided not to
download yet another program I'll only use once and then never touch again. I have GIMP, I can use that to convert
it in BMP, right? Well, no. Even the scammy online converters didn't work. The display would simply show a cryptic,
cropped error. So I caved in and downloaded ImageMagick. And lo and behold, it worked. Now all I had to do was to
print the rest of the body and my Wheatley crab would be done.
Finishing touches
I screwed the whole thing together using random screws I had lying around. I tapped down unused cables with duckt tape. And glued the leg thingies with superglue. My god. The superglue. It was everywhere. I am terrible with it. It was all over my fingers for two days. Anyway my Wheatley Crab turned out pretty much the same as all of my DI-Why projects. Scuffed AF but I love it anyway.
