SmolBoatRemiXD
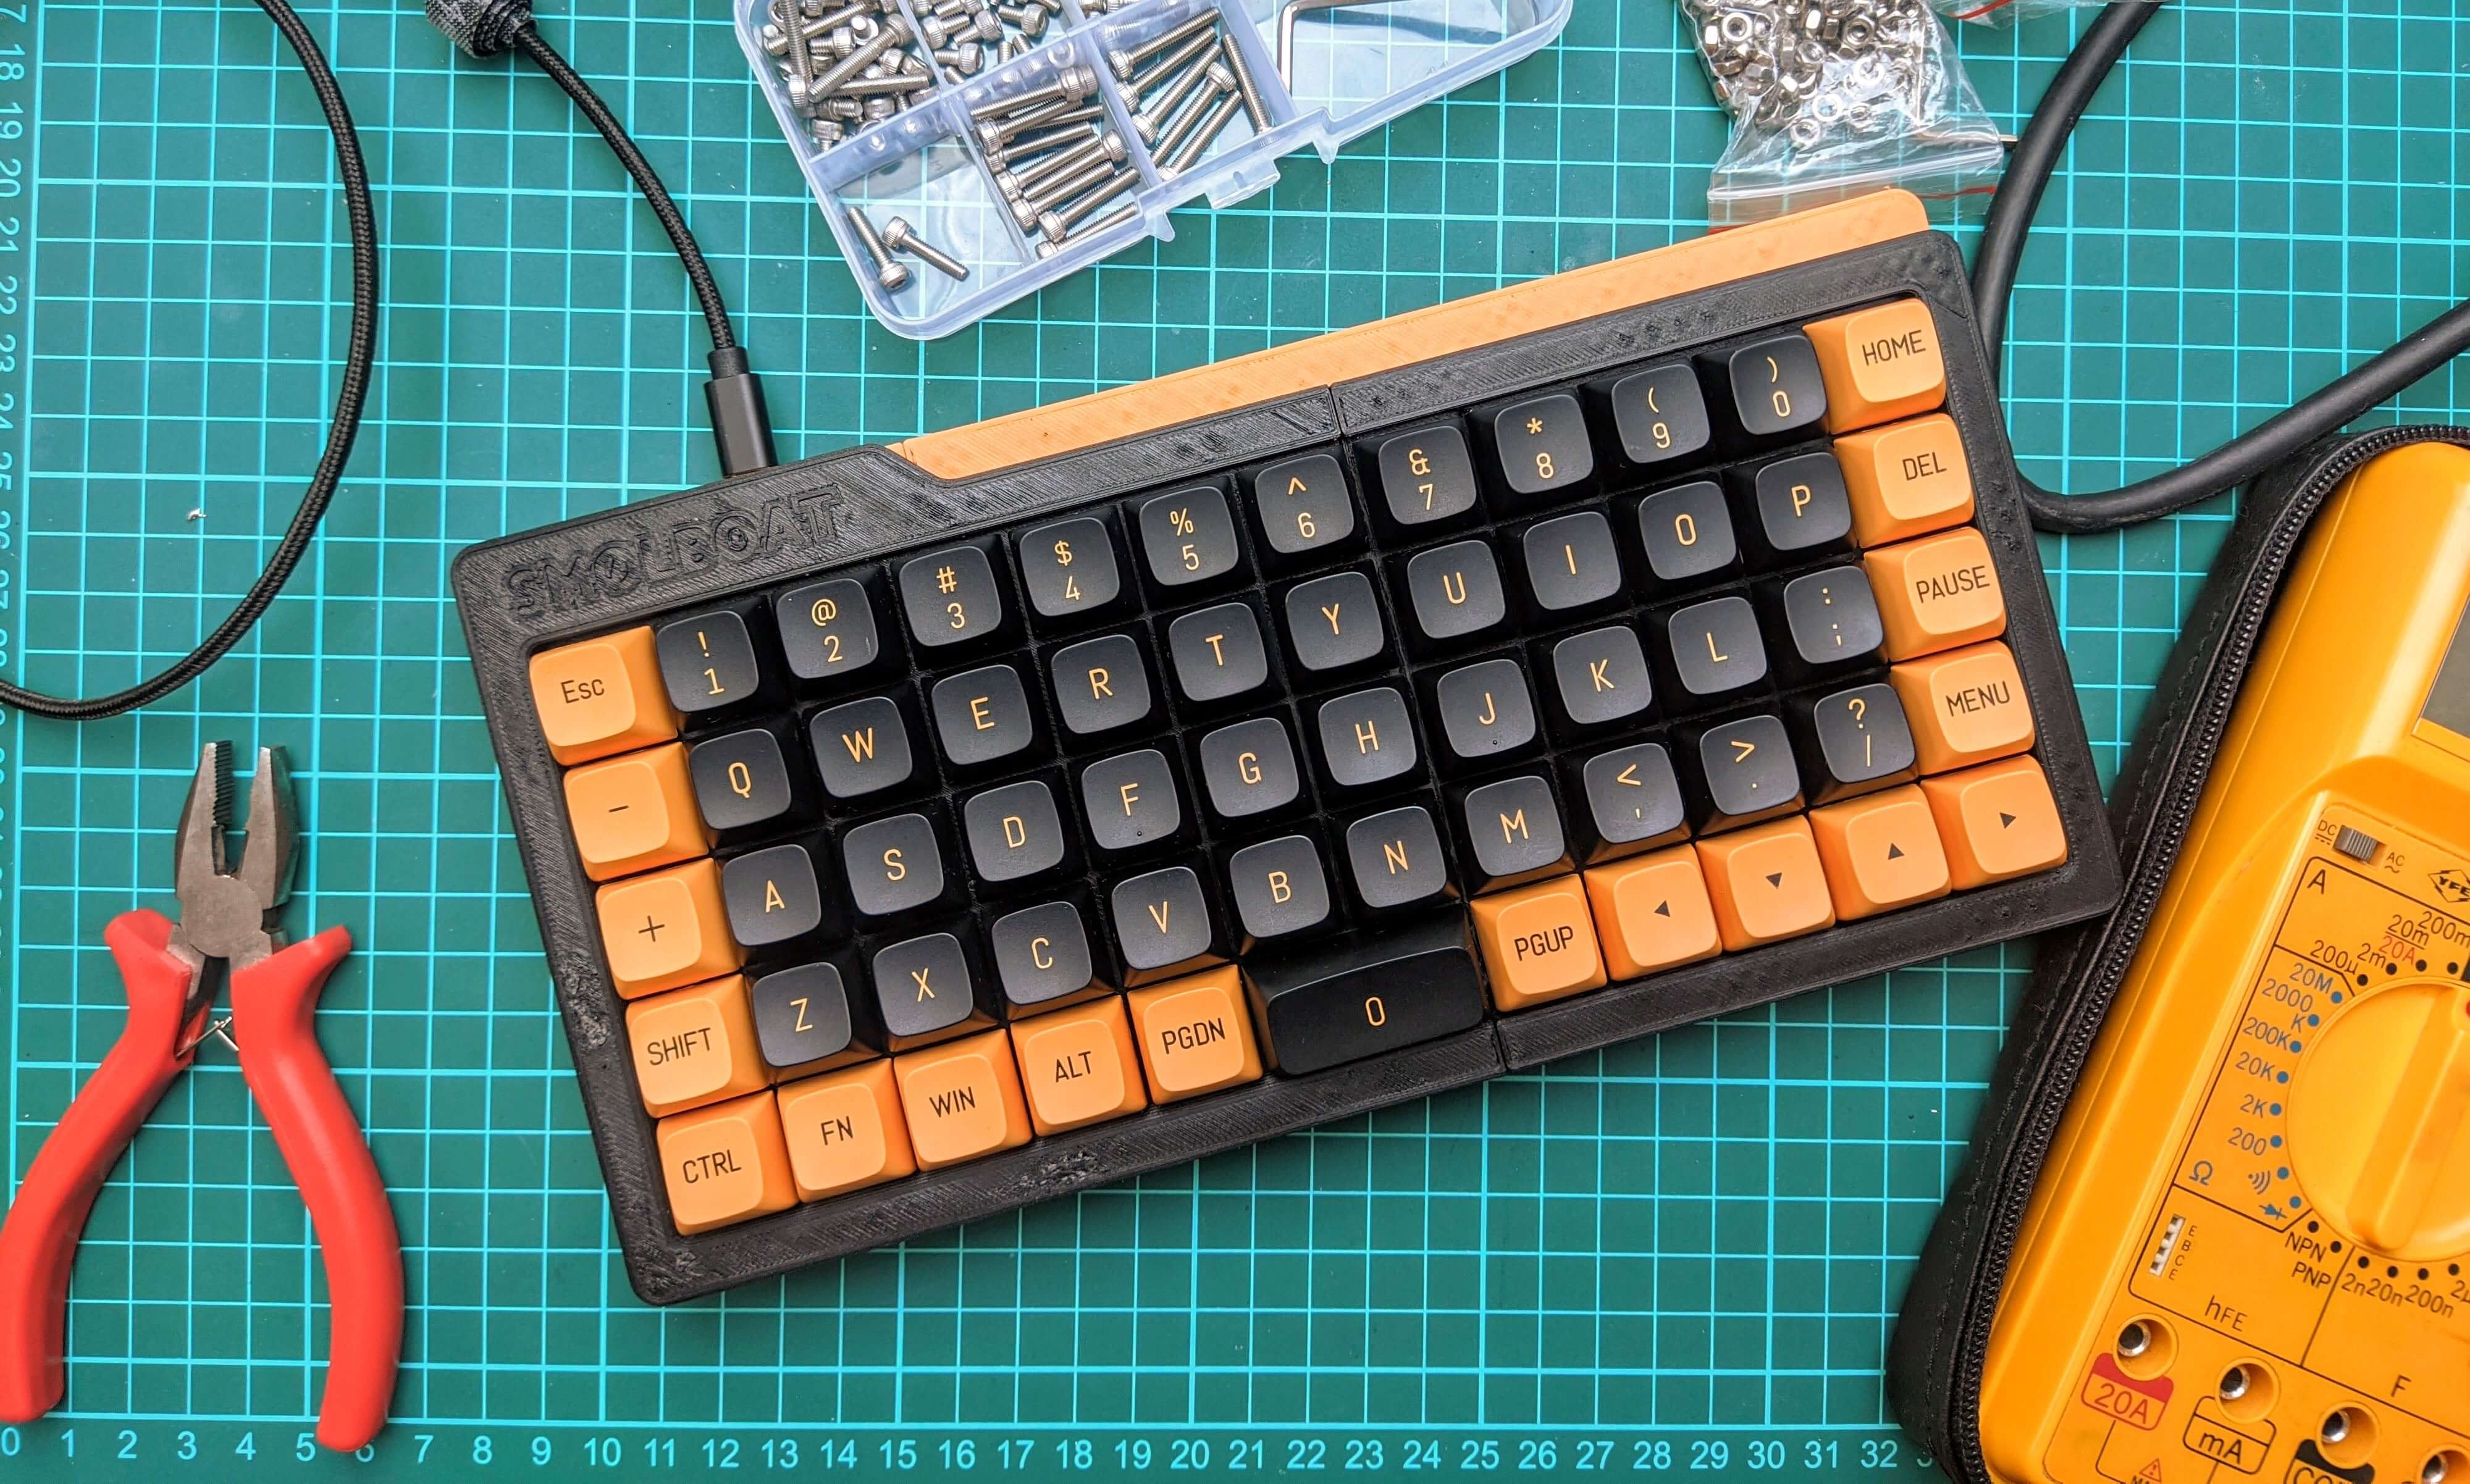
SmolBoat is a custom 3D printed mechanical keyboard designed by Druz320 on Thingiverse. While I really liked the design, there were some tweaks that I wanted to make. I also needed smaller models, so I could print it on my small 3D printer. Please note that this firmware is focused only on the JJ50/Preonic clone.
Changes compared to the original
- Changed the cutout to fit the SparkFun Pro Micro
- Added a hole for controller brace
- Added cherry stabiliser for 2U spacebar
- Added smaller cut files to print on my 3D printer
STLs
There are 4 smaller files STL files, two for the bottom and 2 for the top piece. The pieces have holes in the sides for pegs, also included in the .STL files, of which you will need 4 of. The pegs help with glueing and overall rugidity of the whole case. As I didn't have any glue suitable for PLA, I used a 3D pen to "weld" the pieces together, which is also a valid option, however make sure to sand down the top piece afterwards, or the switches may not sit fulsh.
Wiring
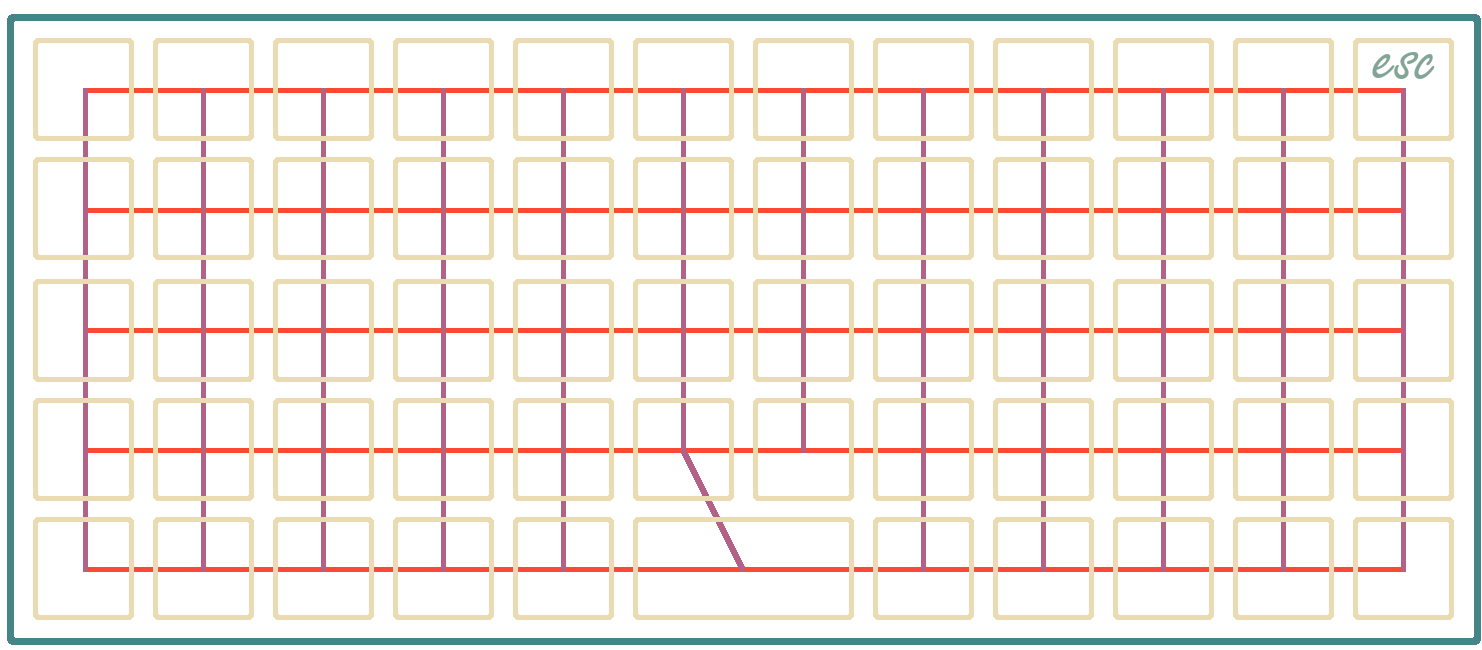
This is a standard hand wired keyboard. The rows are connected with diodes and the columns are joined
together with wire. I may have gotten the wiring confused, so in the following tables you can see the wiring
I was going for. If your keyboard does not work properly, you can just change the MATRIX_ROW_PINS and
MATRIX_COL_PINS
in the config.h
file and recompile it using QMK or Vial.
| Row number | Pin number |
|---|---|
| 0 | D3 |
| 1 | D2 |
| 2 | D1 |
| 3 | D0 |
| 4 | D4 |
| Column number | Pin number |
|---|---|
| 0 | B6 |
| 1 | B2 |
| 2 | B3 |
| 3 | B1 |
| 4 | F7 |
| 5 | F6 |
| 6 | F5 |
| 7 | F4 |
| 8 | B5 |
| 9 | B4 |
| 10 | 36 |
| 11 | D7 |
Wiring diagram
Firmware
There are 3 firmware files available to flash on keyboars's github page. Versions 1 and 1.1 are written in QMK. I do not reccommend you using those, since I use Czech QWERTZ layout. There is also a Vial firmware file, that it based on the QMK 1.1 file, but is very easy to reprogram using Vial software. That means you do not need to programm, compile and flash the firmware whenever you want to make some changes to it. More on Vial firmware here.
Notes
I ended up not using the controller brace piece, since my awful wiring is pushing the Pro Micro to its
place
You might have to file file the Cherry stabs hole a bit for it to fit.
I'd love to add Vial support sometime in the future.
The keyboard you can see in the first picture is the finished product, however I am dissatisifed with the
top finish from my 3d printer, I may have to remake it some time in the future.
Explore the
source code on Github!
Visit the
original project on Thingiverse.

